If you have ever performed any audio/video conversions, you’ll surely encountered FFmpeg framework.
FFmpeg is a multimedia framework that is able to decode, encode, transcode, stream, filter and play audio or video files. It has many features and it supports the most ancient formats up to the cutting edge technologies.
FFmpeg is also highly portable, it runs on Linux, Mac OS X, Windows, BSDs, Solaris, etc. In this tutorial, you will learn how to get FFmpeg installed on your Windows 10 machine.
Downloading FFmpeg
To download FFmpeg, follow the below instructions:
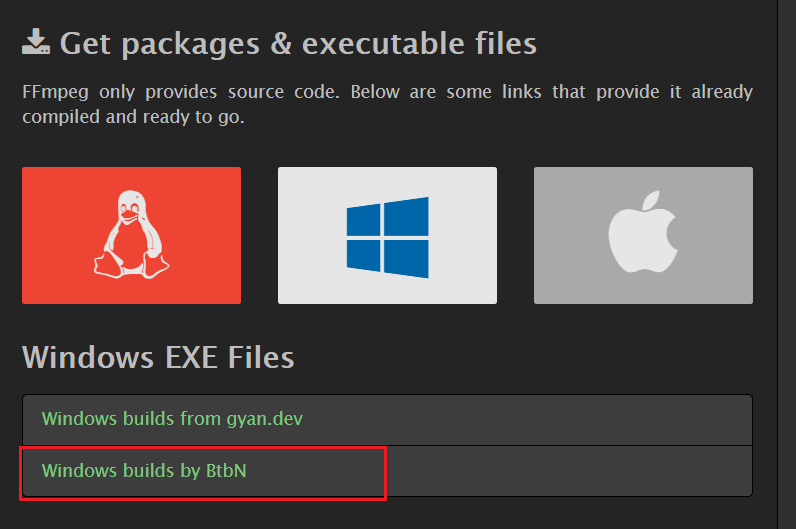
Head to the official downloading web page and hover into the Windows icon and click on the second link, as shown in the below image:
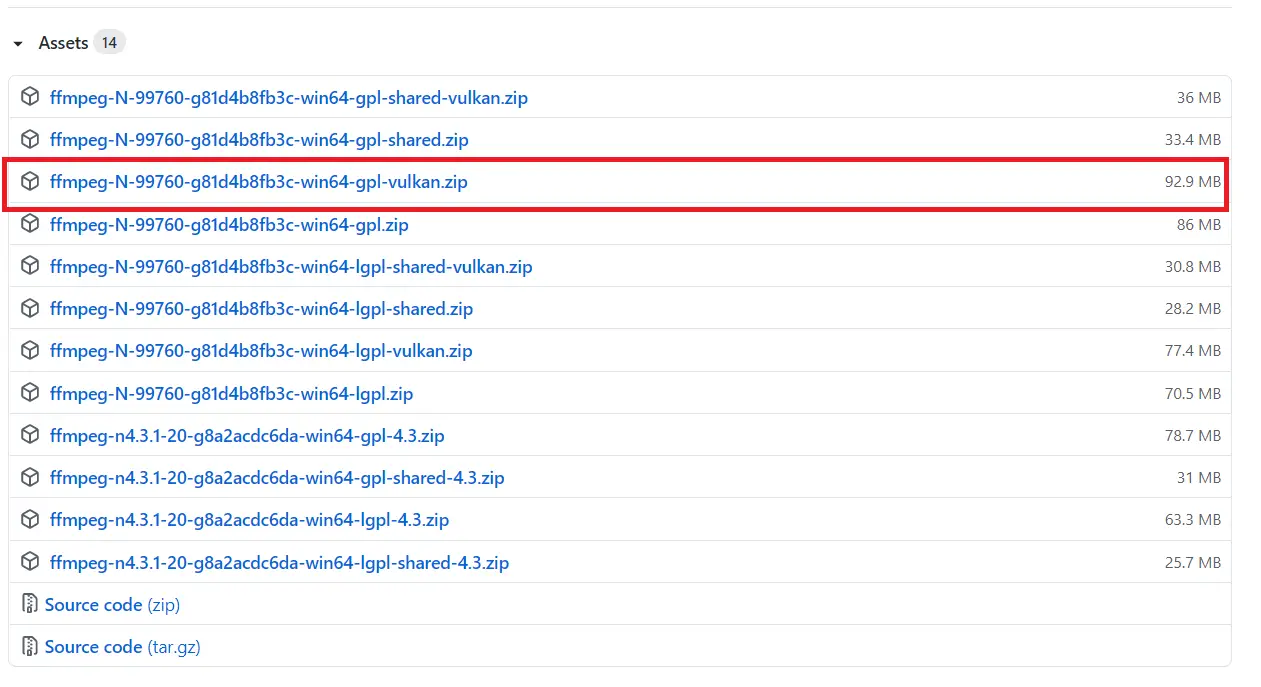
You’ll be redirected to Github releases page, and you’ll see a lot of releases, choose the marked one:
Once it’s finished downloading, extract the ZIP file into any place in your computer, you just need to remember the absolute path where you’ve extracted it.
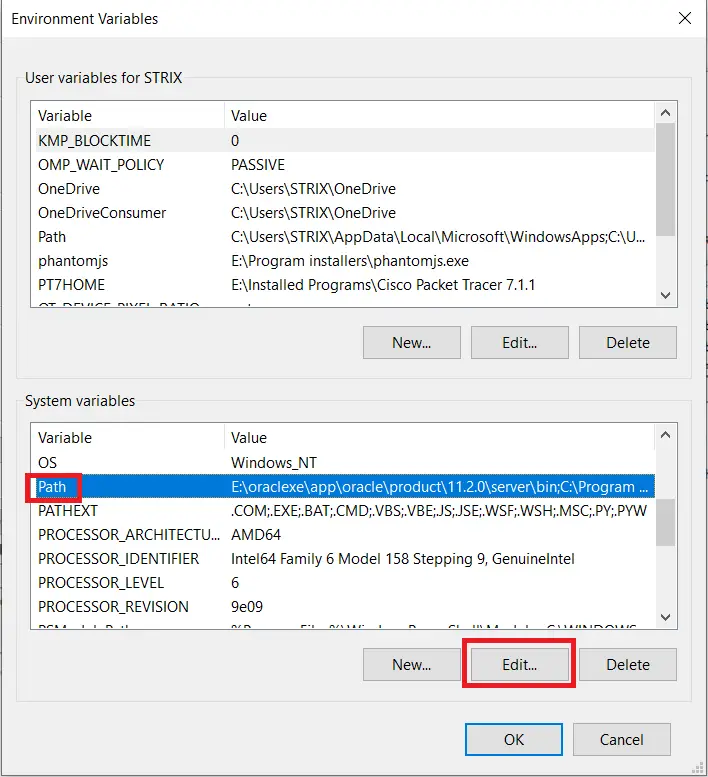
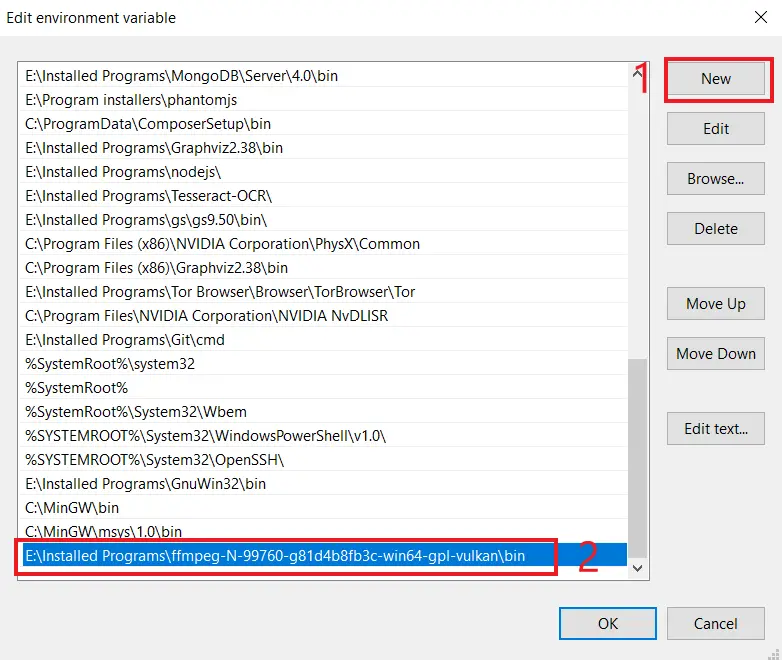
Go to Windows Environment variables, and add the path in which you extracted FFmpeg and add
\binto it (For example, in my case it’s inE:\Installed Programs\ffmpeg-N-99760-g81d4b8fb3c-win64-gpl-vulkan\bin), the following sequence of images shows the whole step: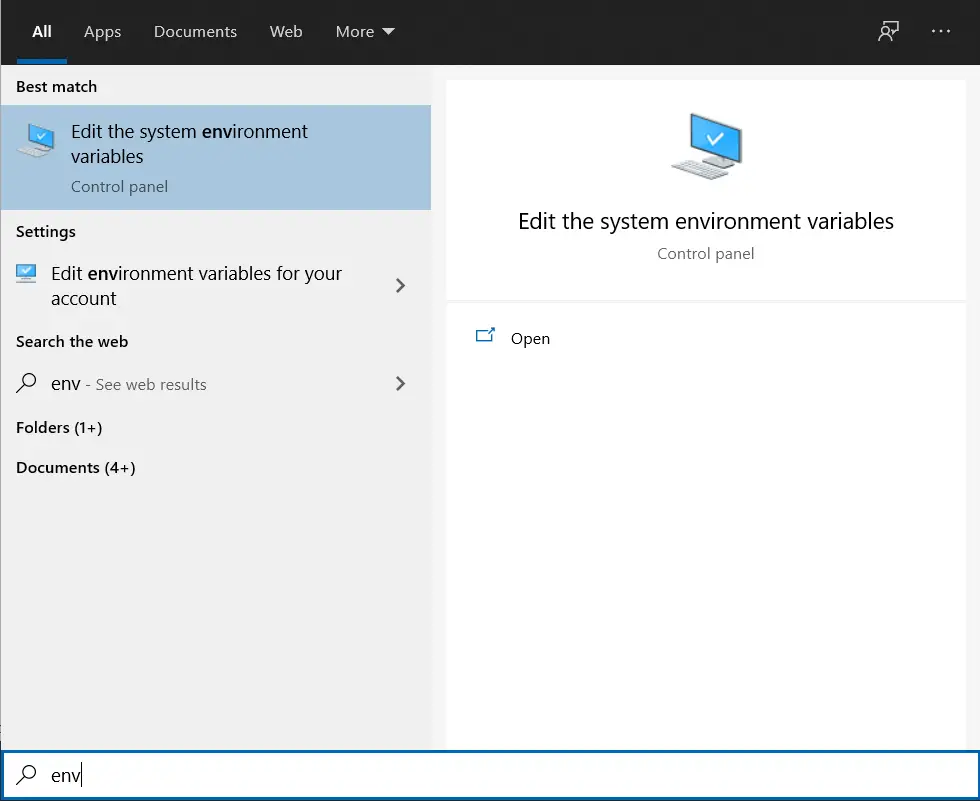
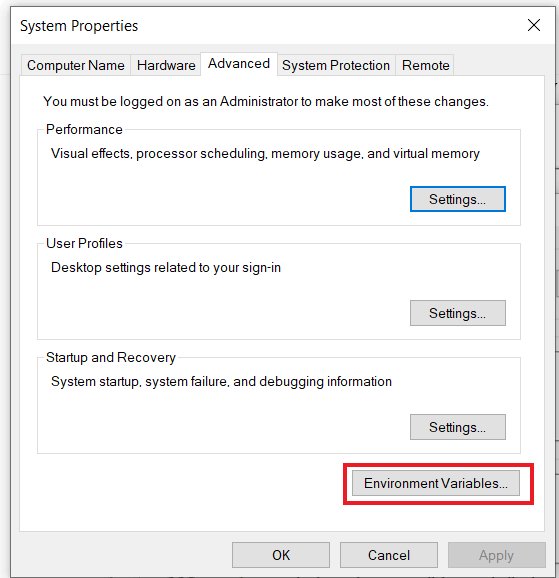
Click OK for the three windows that are open and everything should be set. Go to the command line and type
ffmpegand you should see it working as shown in the following figure: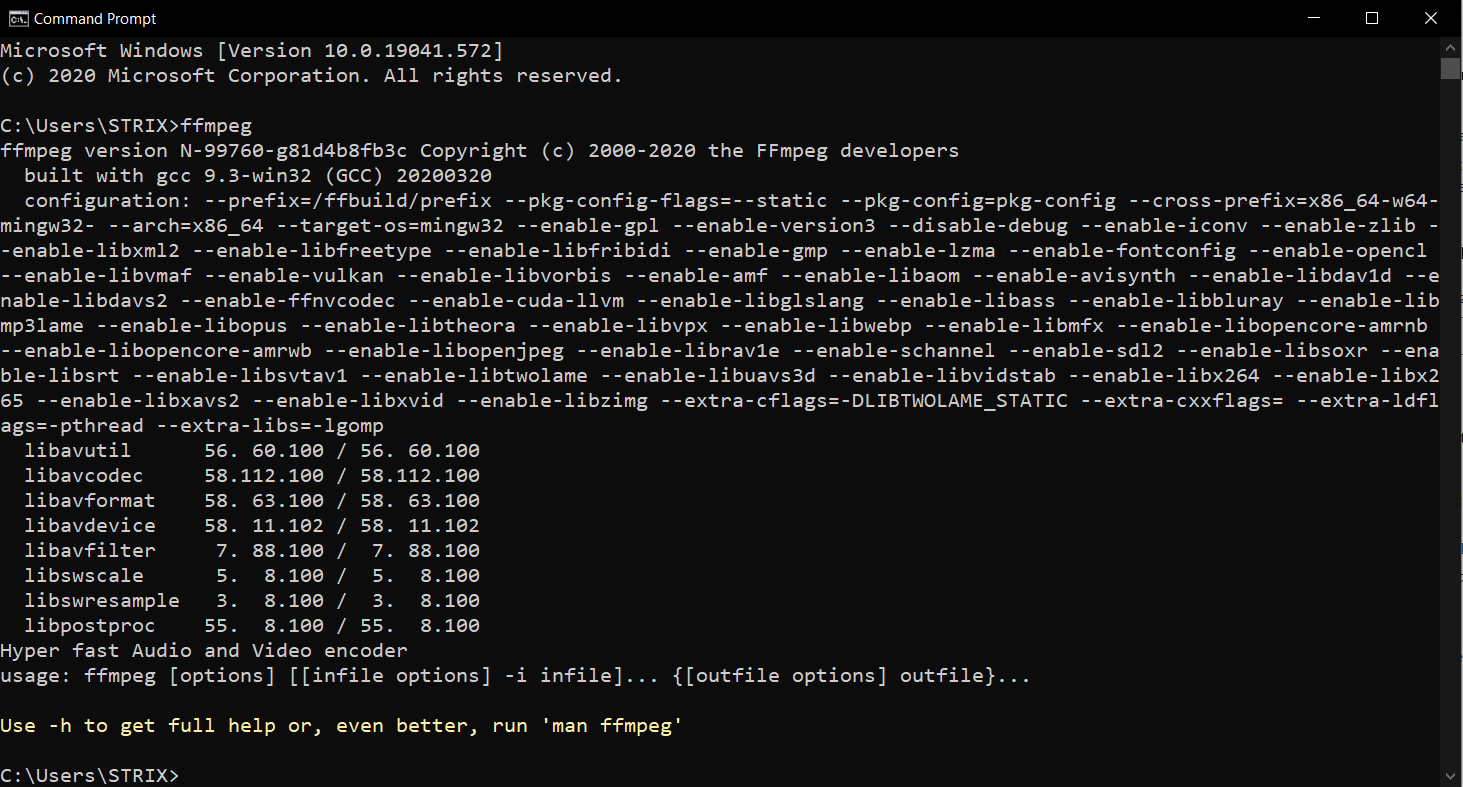
Conclusion
Awesome, in this tutorial, you’ve learned how to download and set up FFmpeg framework in your Windows 10 Machine.
Happy Installing!
