Django is a popular high-level open-source Python web framework. It is well known for rapid development and unit testing included in the framework.
Django works well for most web applications and comes with essential tools to solve common issues such as user authentication, a customizable built-in admin interface and more.
Its simple syntax help newcomers get in the game quickly. Popular websites known to have been using Django are Disqus, Instagram, Mozilla, and Pinterest among others. Being scalable, Django gets its full capacity in container environments such as Docker, to build flexible, scalable, and robust systems. This tutorial will go hands-on on setting up Django and its admin interface using Docker.
There are several ways of installing Django on Docker. While an official Docker image was created, it is now deprecated and has been replaced by an official Python image. Django is essentially a Python application, with an internal web server. It can also work with different databases, even with the file-based SQLite which is deployed by default in the development environment.
Learn also: Introduction to Docker.
Below is a typical Django setup for a development environment:

This one is for a production environment:
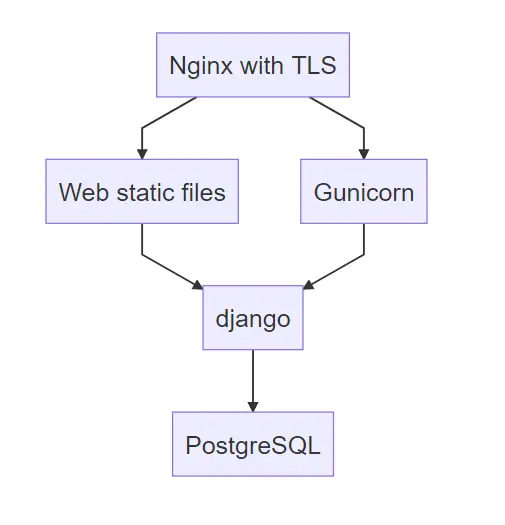
In production, Nginx is used as from web server for its security and performance. It will act as a proxy and transfer all web requests to Gunicorn. On the other hand, Gunicorn WSGI HTTP server. On one side, it serves HTTP traffic to Nginx, and on the other side, it communications to Django via a WSGI file. In this scenario, Django uses PostgreSQL as its database instead of the default SQLite database.
For the sake of simplicity, in this tutorial, we will deploy Django in the development environment.
Django applications start with a project, each project can contain multiple applications, which are Python packages:
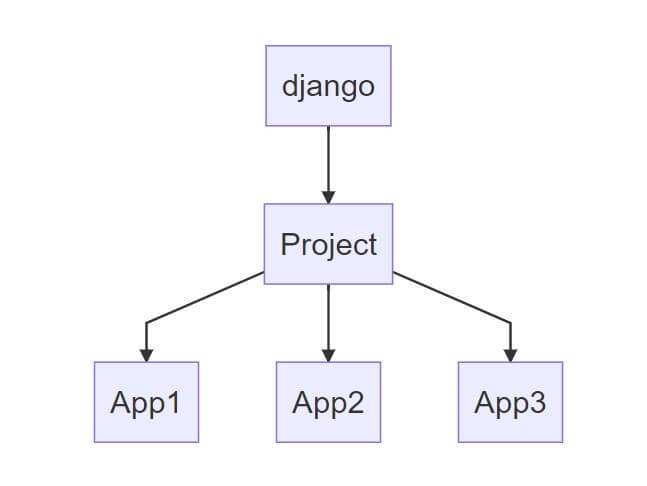
We will only cover the creation of the project. For app creation, which involves coding, you can refer to this documentation.
Hands-on
The setup will be done in the following steps:
- Create the configuration to build the Django image and PostgreSQL containers.
- Create a Django project with the newly built image.
- Configuring Django to connect to PostgreSQL.
- Setup Django admin (admin UI).
The commands have been executed on Ubuntu 18.04 WSL2.
1) Creating the Django image
We will start by creating a Django image, based on our requirements, which we will keep standard. The creation of the image itself is automated with the use of a Dockerfile, which contains all instructions to build it.
Let’s create a folder django_build which will contain the Dockerfile:
$ mkdir django_build
$ cd django_build/
$ vim Dockerfile
We will give Docker all the instructions needed to build the image:
# syntax=docker/dockerfile:1
FROM python:3
ENV PYTHONUNBUFFERED=1
WORKDIR /django_code
COPY requirements.txt /django_code/
RUN pip install -r requirements.txt
COPY . /django_code/
The RUN command will run the pip package manager. pip will get all the required packages from requirements.txt and automatically download and install them. You will probably encounter pip on every Python project. More info on pip can be found here.
After Dockerfile, we will create a new file requirements.txt. It must contain the packages that need to be installed in the Python container. This includes Django and a PostgresQL adaptor.
$ cat requirements.txt
Django>=3.0,<4.0
psycopg2-binary>=2.8
The
requirements.txtfile allow you to select the version of the software you want to use, it can be specified by range or by precising the exact version using==
We also need a docker-compose file to build the platform containing Django and PostgreSQL:
The first part will build a PostgreSQL container:
$ vim docker-compose.ymlversion: "3.9"
services:
db:
image: postgres
volumes:
- ./data/db:/var/lib/postgresql/data
environment:
- POSTGRES_DB=postgres
- POSTGRES_USER=postgres
- POSTGRES_PASSWORD=postgresThe second part takes care of building the Django image:
 django:
    build: .
    command: python manage.py runserver 0.0.0.0:8000
    volumes:
      - .:/django_code
    ports:
      - "8000:8000"
    depends_on:
      - db
Your folder should now contain the following files:
$ ls
Dockerfile  docker-compose.yml  requirements.txt
2) Create a Django Project in the Image
We now have enough information to be able to create a Django project. Notice that the image will be created automatically when asked to create the Django project.
$ sudo docker-compose run django django-admin startproject mydjangoproject .Creating network "django_build_default" with the default driver
Building django
Step 1/6 : FROM python:3
3: Pulling from library/python
d960726af2be: Pull complete
e8d62473a22d: Pull complete
8962bc0fad55: Pull complete
65d943ee54c1: Pull complete
532f6f723709: Pull complete
1334e0fe2851: Pull complete
062ada600c9e: Pull complete
aec2e3a89371: Pull complete
5c6566073cac: Pull complete
Digest: sha256:f265c5096aa52bdd478d2a5ed097727f51721fda20686523ab1b3038cc7d6417
Status: Downloaded newer image for python:3
---> a6a0779c5fb2
Step 2/6 : ENV PYTHONUNBUFFERED=1
---> Running in b5387e1aa418
Removing intermediate container b5387e1aa418
---> 10ae8262e877
Step 3/6 : WORKDIR /django_code
---> Running in 243179b3bc04
Removing intermediate container 243179b3bc04
---> 883ef60e551d
Step 4/6 : COPY requirements.txt /django_code/
---> a0ae7887789a
Step 5/6 : RUN pip install -r requirements.txt
---> Running in 91c42afc36c4
Collecting Django<4.0,>=3.0
Downloading Django-3.2.3-py3-none-any.whl (7.9 MB)
Collecting psycopg2-binary>=2.8
Downloading psycopg2_binary-2.8.6-cp39-cp39-manylinux1_x86_64.whl (3.0 MB)
Collecting asgiref<4,>=3.3.2
Downloading asgiref-3.3.4-py3-none-any.whl (22 kB)
Collecting sqlparse>=0.2.2
Downloading sqlparse-0.4.1-py3-none-any.whl (42 kB)
Collecting pytz
Downloading pytz-2021.1-py2.py3-none-any.whl (510 kB)
Installing collected packages: sqlparse, pytz, asgiref, psycopg2-binary, Django
Successfully installed Django-3.2.3 asgiref-3.3.4 psycopg2-binary-2.8.6 pytz-2021.1 sqlparse-0.4.1
WARNING: Running pip as root will break packages and permissions. You should install packages reliably by using venv: https://pip.pypa.io/warnings/venv
Removing intermediate container 91c42afc36c4
---> 30c4b3969562
Step 6/6 : COPY . /django_code/
---> be6d62c01e1b
Successfully built be6d62c01e1b
Successfully tagged django_build_django:latest
WARNING: Image for service django was built because it did not already exist. To rebuild this image you must use `docker-compose build` or `docker-compose up --build`.
Creating django_build_django_run ... doneIf everything goes well, you should see the project folder that has been created with the command django-admin:
$ ls -l
total 24
-rw-r--r-- 1 user user  180 May 19 22:34 Dockerfile
drwxr-xr-x 3 root      root      4096 May 19 23:30 data
-rw-r--r-- 1 user user  393 May 19 23:14 docker-compose.yml
-rwxr-xr-x 1 root      root       671 May 19 23:30 manage.py
drwxr-xr-x 2 root      root      4096 May 19 23:30 mydjangoproject
-rw-r--r-- 1 user user   38 May 19 22:36 requirements.txt
Notice that the owner of the newly created files is root. We will change it to our local user store in the variable $USER:
$ sudo chown -R $USER:$USER .
$ ls -l
total 24
-rw-r--r-- 1 user user  180 May 19 22:34 Dockerfile
drwxr-xr-x 3 user user 4096 May 19 23:30 data
-rw-r--r-- 1 user user  393 May 19 23:14 docker-compose.yml
-rwxr-xr-x 1 user user  671 May 19 23:30 manage.py
drwxr-xr-x 2 user user 4096 May 19 23:30 mydjangoproject
-rw-r--r-- 1 user user   38 May 19 22:36 requirements.txt
3) Configuring Django to Connect to PostgreSQL
The permissions of the folders and files are now fixed. We can proceed to the configuration of the Django project to use the PostgreSQL database by adding the config below in mydjangoproject/settings.py:
$ vim mydjangoproject/settings.pyDATABASES = {
'default': {
'ENGINE': 'django.db.backends.postgresql',
'NAME': 'postgres',
'USER': 'postgres',
'PASSWORD': 'postgres',
'HOST': 'db',
'PORT': 5432,
}
}Without this setting, the data would go by default to the SQLite integrated database.
Let’s fire up the platform:
$ docker-compose upCreating network "django_build_default" with the default driver
Creating django_build_db_1 ... done
Creating django_build_django_1 ... done
Attaching to django_build_db_1, django_build_django_1
db_1 |
db_1 | PostgreSQL Database directory appears to contain a database; Skipping initialization
db_1 |
db_1 | 2021-05-19 19:55:27.320 UTC [1] LOG: starting PostgreSQL 13.3 (Debian 13.3-1.pgdg100+1) on x86_64-pc-linux-gnu, compiled by gcc (Debian 8.3.0-6) 8.3.0, 64-bit
db_1 | 2021-05-19 19:55:27.321 UTC [1] LOG: listening on IPv4 address "0.0.0.0", port 5432
db_1 | 2021-05-19 19:55:27.321 UTC [1] LOG: listening on IPv6 address "::", port 5432
db_1 | 2021-05-19 19:55:27.339 UTC [1] LOG: listening on Unix socket "/var/run/postgresql/.s.PGSQL.5432"
db_1 | 2021-05-19 19:55:27.350 UTC [27] LOG: database system was interrupted; last known up at 2021-05-19 19:30:45 UTC
db_1 | 2021-05-19 19:55:27.603 UTC [27] LOG: database system was not properly shut down; automatic recovery in progress
db_1 | 2021-05-19 19:55:27.608 UTC [27] LOG: redo starts at 0/15C6DD8
db_1 | 2021-05-19 19:55:27.608 UTC [27] LOG: invalid record length at 0/15C6E10: wanted 24, got 0
db_1 | 2021-05-19 19:55:27.608 UTC [27] LOG: redo done at 0/15C6DD8
db_1 | 2021-05-19 19:55:27.632 UTC [1] LOG: database system is ready to accept connections
django_1 | Watching for file changes with StatReloader
django_1 | Performing system checks...
django_1 |
django_1 | System check identified no issues (0 silenced).
django_1 |
django_1 | You have 18 unapplied migration(s). Your project may not work properly until you apply the migrations for app(s): admin, auth, contenttypes, sessions.
django_1 | Run 'python manage.py migrate' to apply them.
django_1 | May 19, 2021 - 19:55:28
django_1 | Django version 3.2.3, using settings 'mydjangoproject.settings'
django_1 | Starting development server at http://0.0.0.0:8000/
django_1 | Quit the server with CONTROL-C.In case of error, try relaunching the command.
Django should be running now and accessible now on http://127.0.0.1:8000:
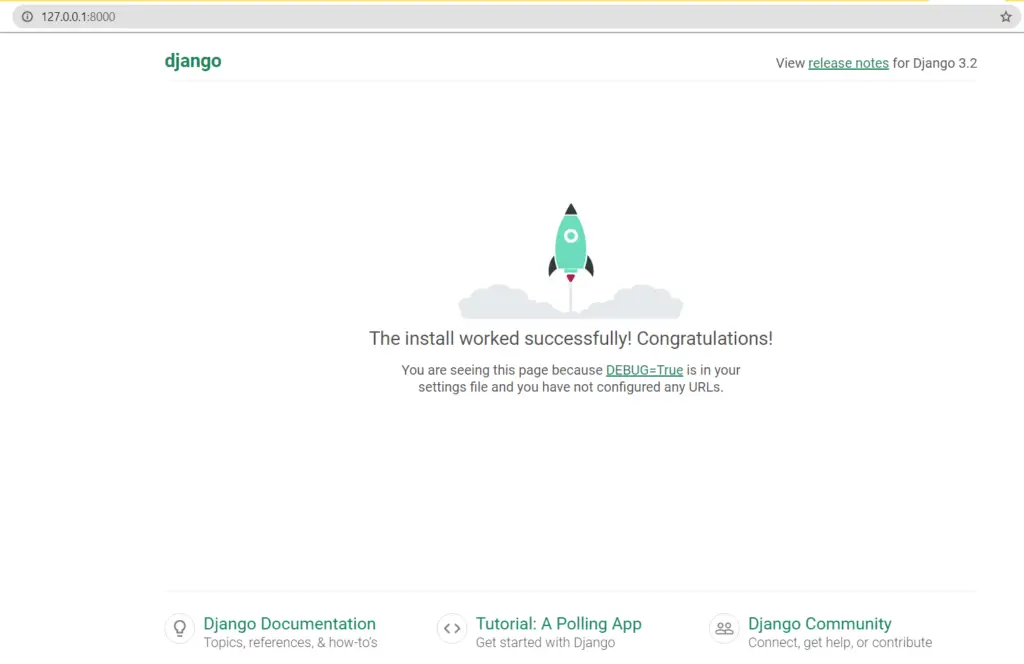
To access the admin page, you need to migrate the database and create a super user, we’ll do that in the next section.
As we still have the docker-compose up terminal session active, you can just type Ctrl+C to stop the platform and proceed to the admin setup.
4) Setup Django Admin
One of the most popular features of Django is its powerful admin interface. It automatically creates CRUD interface which helps developers save a huge amount of time. The admin page will also be accessible on http://127.0.0.1:8000/admin/login/?next=/admin/ once the admin user is created.
Django needs to configure the database through an initial migration process. This can be done simply by running the command docker-compose run django python manage.py migrate:
$ docker-compose run django python manage.py migrate
Starting django_build_db_1 ... done
Creating django_build_django_run ... done
Operations to perform:
  Apply all migrations: admin, auth, contenttypes, sessions
Running migrations:
  Applying contenttypes.0001_initial... OK
  Applying auth.0001_initial... OK
  Applying admin.0001_initial... OK
  Applying admin.0002_logentry_remove_auto_add... OK
  Applying admin.0003_logentry_add_action_flag_choices... OK
  Applying contenttypes.0002_remove_content_type_name... OK
  Applying auth.0002_alter_permission_name_max_length... OK
  Applying auth.0003_alter_user_email_max_length... OK
  Applying auth.0004_alter_user_username_opts... OK
  Applying auth.0005_alter_user_last_login_null... OK
  Applying auth.0006_require_contenttypes_0002... OK
  Applying auth.0007_alter_validators_add_error_messages... OK
  Applying auth.0008_alter_user_username_max_length... OK
  Applying auth.0009_alter_user_last_name_max_length... OK
  Applying auth.0010_alter_group_name_max_length... OK
  Applying auth.0011_update_proxy_permissions... OK
  Applying auth.0012_alter_user_first_name_max_length... OK
  Applying sessions.0001_initial... OK
Let’s now create the superuser, which will allow us to access the admin interface:
$ docker-compose run django python manage.py createsuperuser
Creating django_build_django_run ... done
Username (leave blank to use 'root'): myadmin
Email address: myadmin@myadmin.com
Password:
Password (again):
The password is too similar to the username.
This password is too short. It must contain at least 8 characters.
Bypass password validation and create user anyway? [y/N]: y
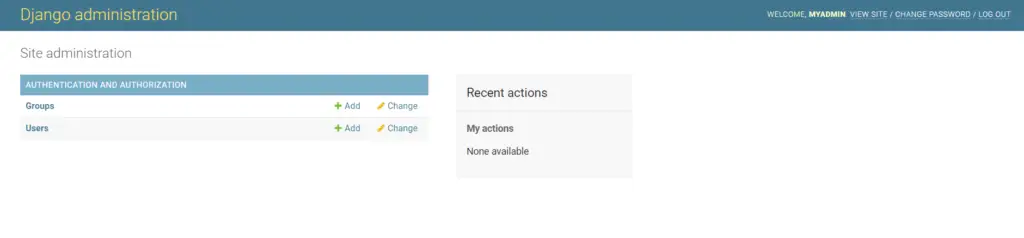
Superuser created successfully.We can now start the platform again with docker-compose up and access to the admin page:
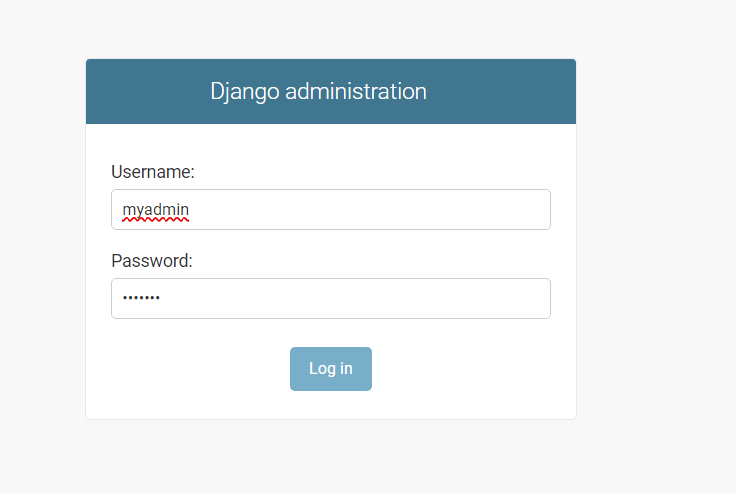
The admin interface is now fully accessible on http://127.0.0.1:8000/admin:
Our Django setup is complete with a project. From that point, you can start creating your Django applications following the official Django tutorial.
Conclusion
This tutorial has covered different topics such Dockerfile, allowing us to build a custom Docker image in an automated way, and an introduction to Django and creating Python application in a container environment.
Though Django is a very attractive framework, configurations can get very complex once applications are deployed in production. You will find more information in Django’s documentation. You will also find more details on how to create Django applications and customizing the admin interface.
You can also use your docker-compose file to deploy your platform to the cloud like AWS. It might require little changes to be loaded on the platform and should find all the requirements on the AWS website.
Happy Docker and Django hacking!
