Docker is an open-source virtualization platform. It went open source in 2013 and has seen rapid adoption in companies since then. Docker offers OS-level virtualization to package software such as web servers, databases into containers. This essentially removes the virtual machine overhead like VirtualBox, VMware and other virtualization technology depending on virtual machines. Containers allow to maintain software in complete isolation without impacting the whole host system with dependencies and modifying global files.
This tutorial will help you get familiar with Docker and kick off your journey with containers.
Docker Architecture
Below is a diagram from Docker’s official website showing Docker architecture:
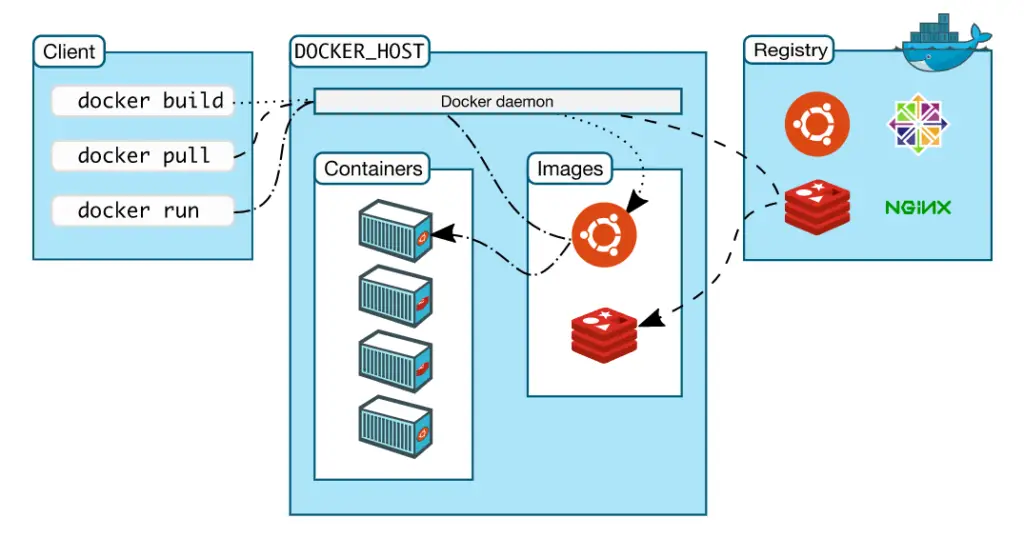
Here is a brief explanation of the different sections:
| Sections | Description |
|---|---|
| Client | The client is the command line interface or CLI that allows you to run docker commands |
| Host | The host contains all the essential files and software for docker to run. It will contain images you downloaded or built and also the running containers. |
| Repository | This makes the life of developers and administrators much simpler and it also allows for reproducible environments across different systems. Software publishers often release their software as containers and make them available in the docker hub or repository. |
Hands-on
Installation
Docker can be installed on Linux, Mac and even Windows. If you want to try from Windows and WSL, be sure to have WLS2 installed. Docker already has a complete documentation for its installation. Head to Get Docker page to properly install Docker for your environment.
Pulling Images
Once Docker is installed, you can pull any image you want from the Docker Hub repository. For this tutorial, let’s start by pulling Nginx, which is one of the well known web servers:
$ docker pull nginx
Using default tag: latest
latest: Pulling from library/nginx
45b42c59be33: Pull complete
d0d9e9ea897e: Pull complete
66e650438339: Pull complete
76a3dfe4406b: Pull complete
410ff9d97480: Pull complete
Digest: sha256:8e10956422503824ebb599f37c26a90fe70541942687f70bbdb744530fc9eba4
Status: Downloaded newer image for nginx:latest
docker.io/library/nginx:latest
Once the download is completed, you can list your available images:
$ docker images
REPOSITORY               TAG                 IMAGE ID            CREATED             SIZE
nginx                    latest              298ec0e28760        7 days ago          133MB
The image is only the files needed to run the container. The container (running software) will be created from the image. You can run many containers out of a single image!
Create and run a container
A container can be run either in foreground (interactive) or detached mode. If you want to interact with the container in a similar as when you login a system, then use the foreground mode.
Launching a container with the bash shell:
$ docker run -it nginx /bin/bash
root@eed549b099b1:/#
The switch -i launches the container in interactive mode (it will keep STDIN open) and -t will allocate a pseudo-TTY to the container.
The command
runactually creates the container from the image nginx. The container will be destroyed once you exit the container.
Setting a hostname when creating a container:
$ docker run -it --hostname="webserver" nginx /bin/bash
root@webserver:/#
You will also notice that a bunch of common commands will often not be installed on the images:
root@webserver:/# ip a s
bash: ip: command not found
root@webserver:/# ping localhost
bash: ping: command not found
This is because the containers are designed to be as lightweight as possible, while providing the respecting services, in this case Nginx.
Let’s now use our Nginx image to run a container listening on port 80:
$ docker run --hostname="webserver" -p 80:80 -d nginx
601334ad39429691636e1d6e151492a38263ec8a23df9637621a8a5993db0834
We used -d to run the container in the background, and we publish a container’s port to the host using the -p parameter.
-p 80:80 means it maps port 80 on host machine to port 80 on the container. For example, if you want to run Nginx on port 8080 on your host machine, then you set it to 8080:80.
To check if the container is actually working, the following docker command does that:
$ docker container ls
CONTAINER ID        IMAGE               COMMAND                  CREATED             STATUS              PORTS                NAMES
601334ad3942        nginx               "/docker-entrypoint.…"   2 minutes ago       Up 2 minutes        0.0.0.0:80->80/tcp   vibrant_bell
Notice the port mapping on the port 80, this is what allows you to connect to your Nginx container. The mapping was done with -p 80:80. If you check on your host, you’ll notice that the port 80 is open:
$ ss -ntlp
State                      Recv-Q                      Send-Q                                              Local Address:Port                                             Peer Address:Port
LISTEN                     0                           4096                                                            *:80                                                          *:*
We can now access our webserver :
$ links -dump http://localhost
Welcome to nginx!
If you see this page, the nginx web server is successfully installed and
working. Further configuration is required.
For online documentation and support please refer to nginx.org.
Commercial support is available at nginx.com.
Thank you for using nginx.The above command uses links cli web browser command to see whether Nginx server is working.
If the above command raises the command indicating the command not found, you can easily install links with apt:
$ sudo apt update
$ sudo apt install links
Execute command on running container
To run a command on a running container, we need to first have the container’s ID:
$ docker container ls
CONTAINER ID        IMAGE               COMMAND                  CREATED             STATUS              PORTS                NAMES
601334ad3942        nginx               "/docker-entrypoint.…"   18 minutes ago      Up 18 minutes       0.0.0.0:80->80/tcp   vibrant_bell
Now that we have the ID, we can run the command with exec instead of run. Here we are running the command ls on the container:
$ docker exec 601334ad3942 ls
bin
boot
dev
docker-entrypoint.d
docker-entrypoint.sh
etc
home
lib
lib64
media
mnt
opt
proc
root
run
sbin
srv
sys
tmp
usr
var
www
Persistent data via volume
Data in a container is not persistent. Once the container is stopped, you will lose all written data. Let’s try it out!
We will create a file on the running container with touch:
$ docker exec 601334ad3942 touch /home/mydata
$ docker exec 601334ad3942 ls /home/mydata
/home/mydata
We can see that the file is present. Now let’s stop the container and launch another one from the same image:
$ docker stop 601334ad3942
$ docker run -it --hostname="webserver" nginx /bin/bash
root@webserver:/# ls /home/
root@webserver:/#
The previous file mydata is no longer available as we created a new container. To make changes persistent, you need to create a volume. Let’s delete the previous container, by using exit command as we’re not running in detached mode:
root@webserver:/# exit
exit
Now let’s create a volume that will be used by the new containers:
$ docker volume create mydata
mydata
$ docker volume ls
DRIVER              VOLUME NAME
local               1e95a7a656a43a1520360a02377fe412a9faf143b4e332530ae654f9c08fcd5f
local               2f068575e3d908632eb544a47ec6e5f38fc71af664949c627f12b38d8d1aa9d9
local               5ef03800185c1c97c2b1d7a5eac22da0b386ac06364d2c140d24ad6625f05d5b
local               6f03a2fa00fabbe9197d341b2f77d1f861e47c2147025e0532834d59a925123b
local               22a4a43e62fb4f431cbd792e08ff9b3315c43d2a4004aec141b09af71b354b09
local               74df639086ba283ab5cce14f65c89fb37a3567778c0c1634d2ed0e339bf8f226
local               77e9359d8b2e88c79a7afcb6b2e2e841e72f80dffc8b2e6982abb7fc33c2000b
local               81ccb23561b762ebcda18d9721ab9121a176d63494faf1ef004806d3651be370
local               92ed8a1996b5cdb4b7de4d4925ac8864c9a6223849d201404ba635083f9dc0df
local               96905d53451acd5a7b83bab34fec58799a1a8db341c6bdf1d5dd373bf5a1fa3b
local               3935083fc00b5f71debab1ba65698355834451b85daf050906c8f2d4598703a0
local               abbd864f6a8cb8c811f16fdf768ff87b3d2de0bb35d893a7f771f325e2765dce
local               b74916985a90518afae85a85a9d2a2ed07be1a7f07489596d61c3e0c829a5c20
local               ce672e5df74afe95480fa5f32726355a6cea7558e8fdfcf01380745159296439
local               daa7e48e91f2c8175f56ad5e8ec5901cb82701970b8da779eec8ec087ce09b7b
local               dc0048dd8d6b4597c275b30d877bb8fe0957baccf94c91474bee8906e6db9704
local               f7aa4b5534a0e27897f1df2e5aacfec0a37c3a94b3571399a5fa9c55738ff200
local               fefff75043229c4febe3df4cae265f894fee436baaf50ca999d6a0f3f54a4f64
local               fff7933bf781a1f077077dd485d8cd3bf59f2864ebf574f254723c6ac195ecc5
local               mydata
We’ll then create a container webserver1 and make it use the volume mydata, mounting it on /mydata in the container:
$ docker run -it --hostname="webserver1" --mount source=mydata,target=/mydata nginx /bin/bashLet’s create a file in the mounted volume within the container:
root@webserver1:/# echo "shared data" > /mydata/info.datWe can now create a second container which we will name werbserver2, connecting it to the same volume and check if we can see the previously created file:
$ docker run -it --hostname="webserver2" --mount source=mydata,target=/mydata nginx /bin/bash
root@webserver2:/# ls /mydata/
info.dat
It worked!
The volume
mydatawill still exist even after both containers are stopped.
Docker Compose
To create complex platforms with multiple inter-connected containers, we can use Docker compose files:
We will build a WordPress with a web server (Nginx) and a database (MySQL) using a compose file:
$ mkdir wordpress
$ cd wordpress/
$ vim docker-compose.yml
Fill the docker-compose.yml file with the following configuration:
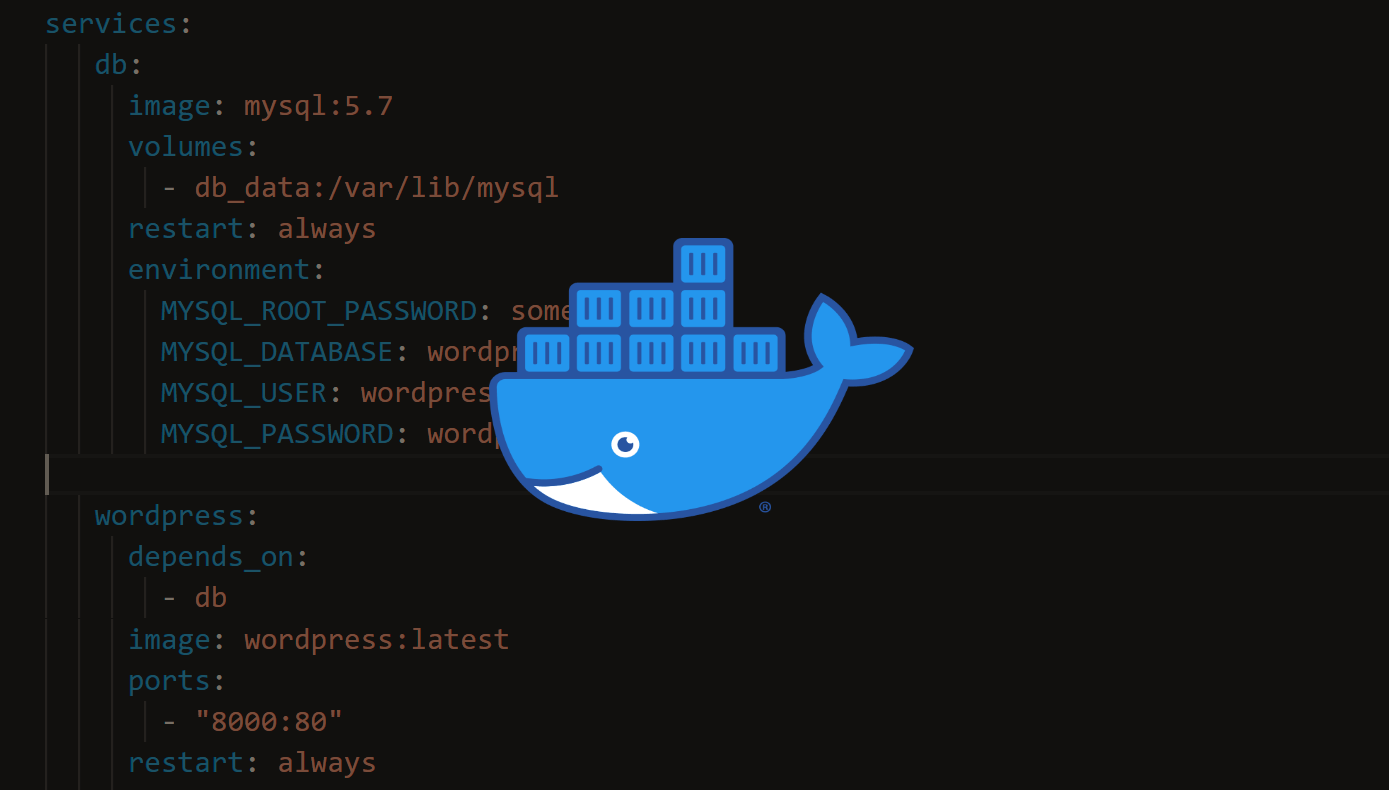
services:
db:
image: mysql:5.7
volumes:
- db_data:/var/lib/mysql
restart: always
environment:
MYSQL_ROOT_PASSWORD: somewordpress
MYSQL_DATABASE: wordpress
MYSQL_USER: wordpress
MYSQL_PASSWORD: wordpress
wordpress:
depends_on:
- db
image: wordpress:latest
ports:
- "8000:80"
restart: always
environment:
WORDPRESS_DB_HOST: db:3306
WORDPRESS_DB_USER: wordpress
WORDPRESS_DB_PASSWORD: wordpress
WORDPRESS_DB_NAME: wordpress
volumes:
db_data: {}Now, we’ll build the project with docker-compose up -d:
$ docker-compose up -d
Creating network "wordpress_default" with the default driver
Creating volume "wordpress_db_data" with default driver
Pulling db (mysql:5.7)...
5.7: Pulling from library/mysql
45b42c59be33: Already exists
b4f790bd91da: Pull complete
325ae51788e9: Pull complete
adcb9439d751: Pull complete
174c7fe16c78: Pull complete
698058ef136c: Pull complete
4690143a669e: Pull complete
66676c1ab9b3: Pull complete
25ebf78a38b6: Pull complete
349a839d5e27: Pull complete
40b03e3e5980: Pull complete
Digest: sha256:853105ad984a9fe87dd109be6756e1fbdba8b003b303d88ac0dda6b455f36556
Status: Downloaded newer image for mysql:5.7
Pulling wordpress (wordpress:latest)...
latest: Pulling from library/wordpress
45b42c59be33: Already exists
a48991d6909c: Pull complete
935e2abd2c2c: Pull complete
61ccf45ccdb9: Pull complete
27b5ac70765b: Pull complete
5638b69045ba: Pull complete
0fdaed064166: Pull complete
e932cec09ced: Pull complete
fbe190145b1c: Pull complete
f747612094ef: Pull complete
300f68c220b1: Pull complete
efd583fc4f80: Pull complete
011e53c9540e: Pull complete
90d05db0a960: Pull complete
5faae26e6219: Pull complete
7bf1209c35d8: Pull complete
527f0104274c: Pull complete
435b4e30e1cf: Pull complete
2c8618e23e3e: Pull complete
38bf6a404b0c: Pull complete
Digest: sha256:a0a54e8405881281cbaea36553d7700a07cfd60c062fd2e2d021452d600c1fcc
Status: Downloaded newer image for wordpress:latest
Creating wordpress_db_1 ... done
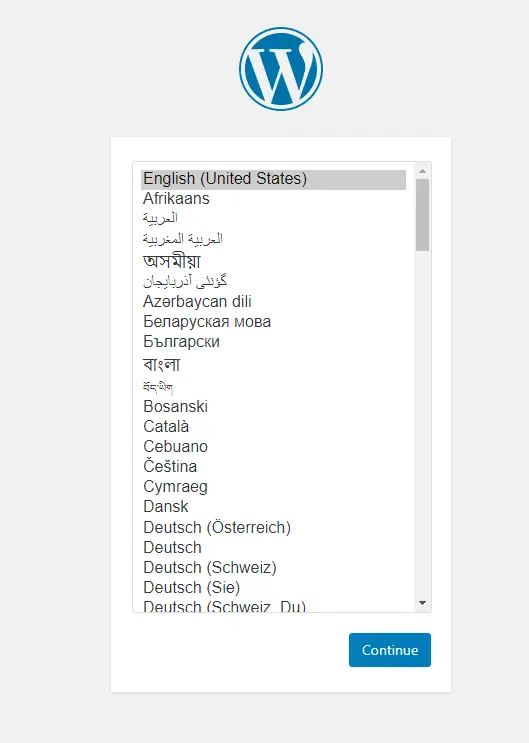
Creating wordpress_wordpress_1 ... doneOnce everything is complete, head to your browser on port 8000 and you should be able to access WordPress’ installation page as shown in the image below:
Cloud deployment
Docker can also be deployed on cloud platforms such as AWS, Azure and GCP. AWS containers can be launched with either lightsail or fargate for instance. Platforms such as Heroku, which also support docker deployments might be preferred by developers.
Conclusion
There is so much more to explore with Docker and we hope that this tutorial has provided you enough knowledge to start your journey with containers. Container knowledge is now pre-requisite for most IT and systems jobs. Try out other images from the Docker hub, there are images of every development software you can imagine.
For more information, I suggest you read the Docker’s official documentation.
Have fun exploring the world of OS-level virtualized container!
